Blogging Tool
Creating a Blog using the Discussion Tool
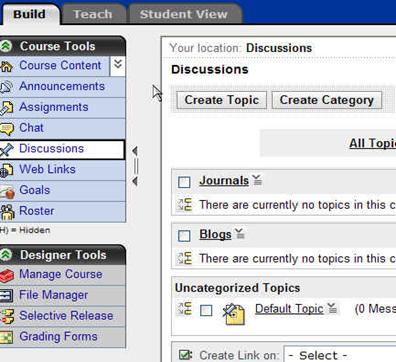
Step 1: Click the Build Tab.
Step 2: In the Course Menu, under the Course Tools heading, click Discussions.
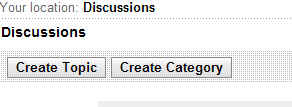
Step 3: Click Create Topic.
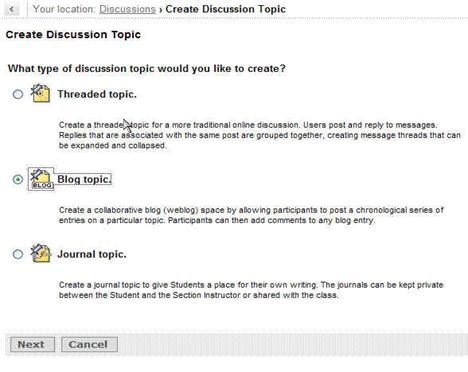
Step 4: Select Blog Topic and click Next.
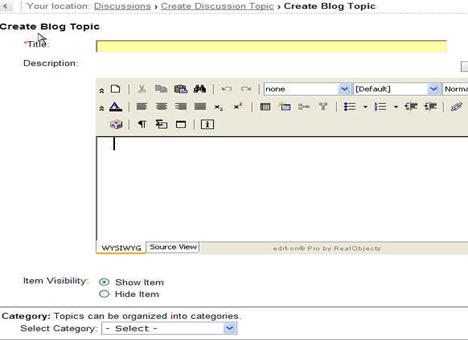
Step 5: In the Title text box, enter a title for your blog.
Step 6: Enter a description if needed.
Step 7: Select a Category to put your blog if applicable.
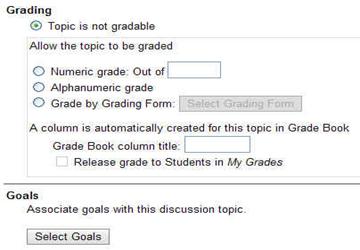
Step 8: Under Grading, select your options. (Ex. Topic is not gradable, numeric grade, alphanumeric grade, or grade by rubric)
Step 9: Under Goals, select any goals you may want to link to this blog.
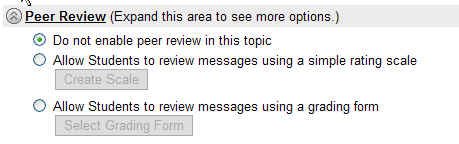
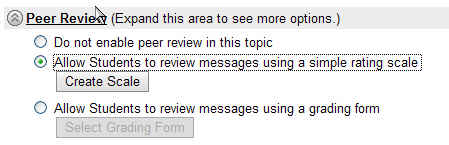
Step 10: Under Peer Review, you can make selections regarding how other students review or respond to blog posts. (Ex. Do not enable peer review, allow students to review messages using a rating scale, allow students to review messages using a rubric/grading form) **See Peer Review Scale Section for more on this feature.
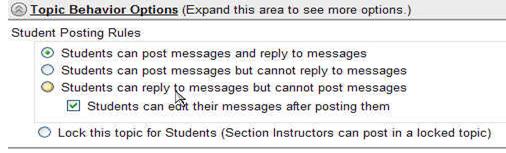
Step 11: Under Topic Behavior Options, select options for how students post and reply to messages.
Step 12: Under Author Identification, select whether authors are identified by user names or anonymously.
Step 13: Select Save when finished.
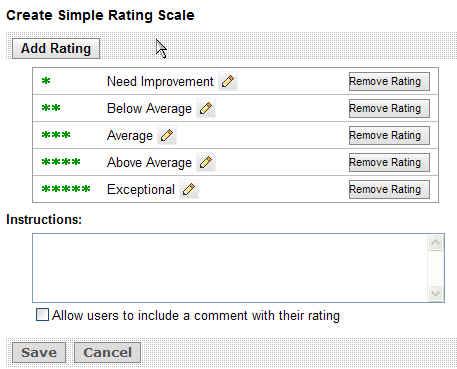
You can have students rate other student posts and comment on them. You can have custom rating variables to allow for maximum peer review.
Step 1: Click “Allow Students to review messages using a simple rating scale”.
Step 2: Click Create Scale.
Step 3: Click Add Rating to create a custom rating variable. (Ex. Needs more content, more specific information needed, too vague) Click Save.
Step 4: Click Remove Rating, to remove a rating from the scale.
Step 5: Click Save when finished with the scale variables.

Exercise – Create a Blog Using the steps for creating a blog, please do the following:
2. Make it gradable worth 5 points. 3. Make it reviewable to students using a grading scale. |
Posting Student Blog Messages
Posting a blog message as a student is very simple.
Step 1: Click the Student Tab.
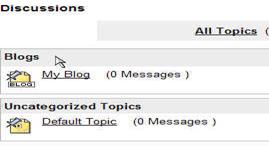
Step 2: In the Course Menu, under the Course Tools heading, click Discussions.
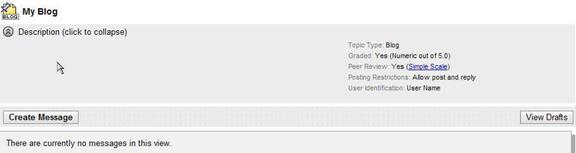
Step 3: Click on the blog title. (Ex. “My Blog” below)
Step 4: Select Create Message.
**Students can view the peer review scale by clicking on the Simple scale link on right hand side above, before they post their first message.
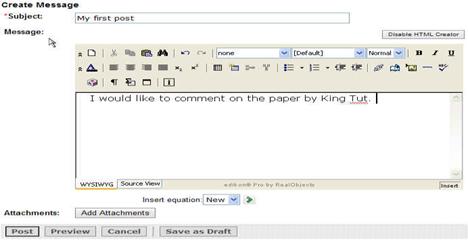
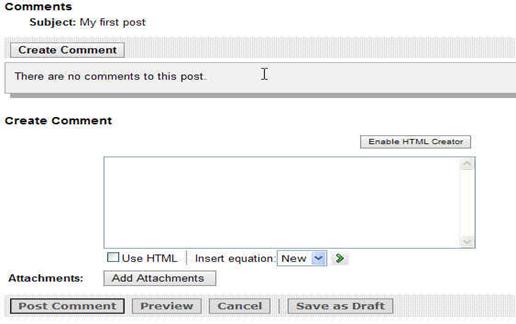
Step 5: Under Subject, enter subject of post.
Step 6: Under Message, type message content here. (Make sure to enable HTML creator)
Step 7: Click Add Attachments to add a file to post.
Step 8: Click Post when done with message.
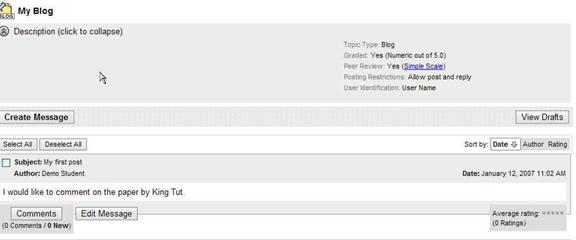
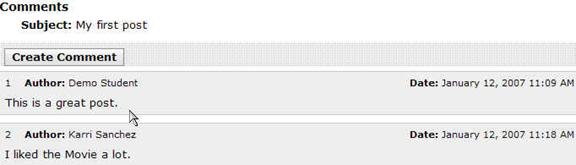
Step 9: Click on Comments, to comment on a post.
Step 10: Click Post Comment to submit your comments to the post and to read other comments as well.
Step 11: Click Comments to view comments.
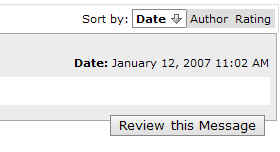
Step 12: Click Review this Message to rate a post.
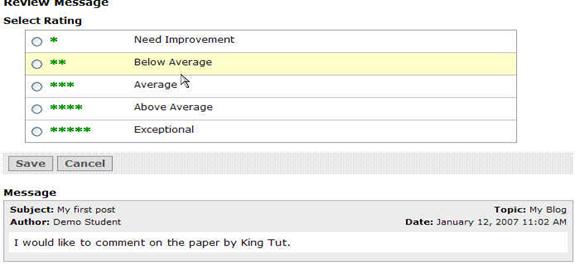
The original message displays at the bottom.
Step 13: Click on a rating option using the radio buttons.
Step 14: Click Save to save rating.
Viewing Peer Review Ratings
To read the peer reviews from other students on your own posts:
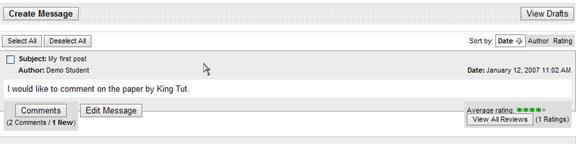
Step 1: Click View all Reviews in lower right hand corner of your post.
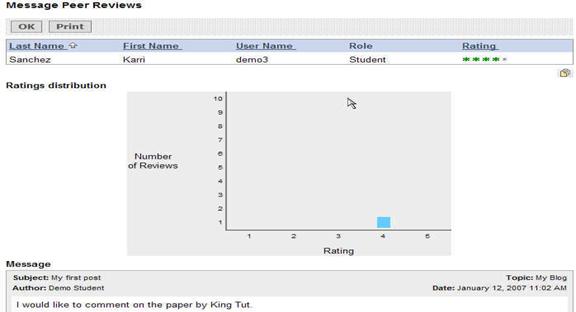
Step 2: Under Message Peer Reviews, you get a detailed graph and a list of peer reviews and ratings.
Step 3: Click on ok or print if you want to print graph and reviews.
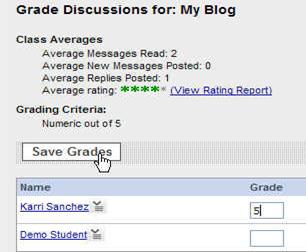
Grading and Reviewing Blog Posts.
As an instructor you have various options in which to grade and review student blog posts. An instructor can view all comments, lock down the message, review the message, grade the message or view all the student reviews of the message.
To grade the blog messages:
Step 1: Click the Teach Tab.
Step 2: In the Course Menu, under the Course Tools heading, click Discussions.
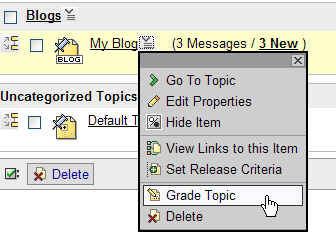
Step 3: Click on the action link, and select Grade Topic.
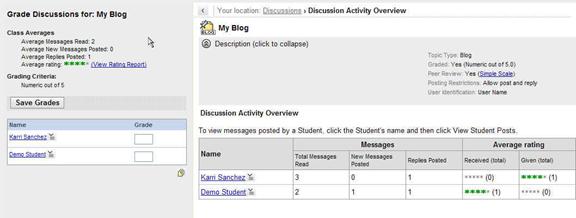
Step 4: Student activity is on the right. Place to grade is on the left.
Step 5: Click on student name to view students post.
Step 6: Put grade under grade box for each student and hit Save Grades.