Assignments: Adding Attachments
(ZIP files) and Setting Start Pages
Contents:
Step 1 Identifying the Assignment Type [back
to contents]
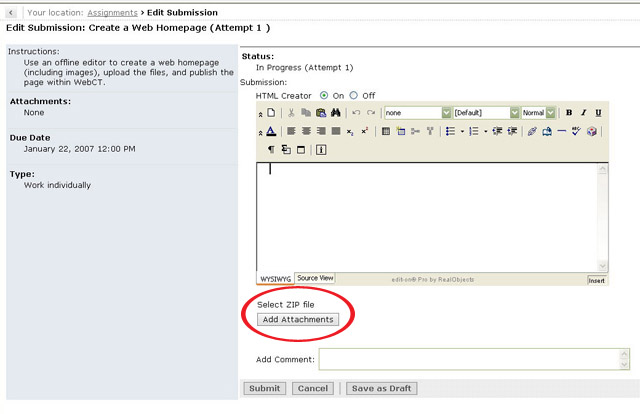
Your assignment will be setup to receive a ZIP file attachment (as
seen below in the bottom right corner "Select ZIP file"). Before using
that option, you need to create the webpage (Step 2).
Step 2 Preparing Your Workspace [back
to contents]
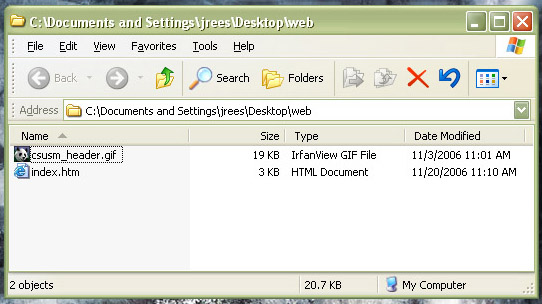
First create a folder on your computer that will hold your webpage
AND all related elements of the page (usually images). Having all of
these pieces in the same spot will make it easier to include them within
the page and to bundle together for uploading into WebCT.
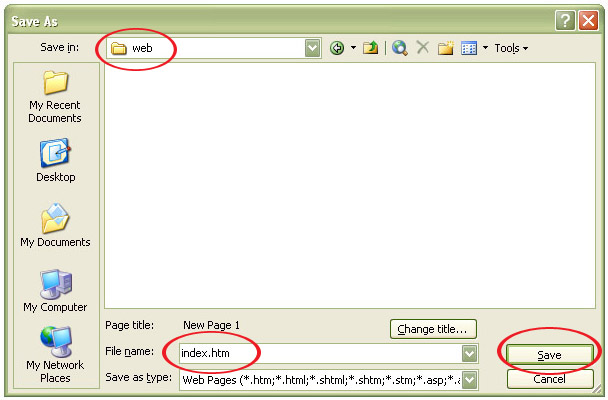
For this example, my folder is "web" and it is located on my desktop.
When saving out the blank webpage, I place it within this "web" folder
and label the file "index.htm" (note that this is the typical filename
for homepages). It is important when making filenames for files
that are published to the web that you do not use special characters or
spaces (only use letters, numbers, and the underscore).
It is also typical to keep everything lowercase because the servers
often treat "Index.htm" as a different file than "index.htm" and thus
only one should be used. Lowercase is the typical convention people use.
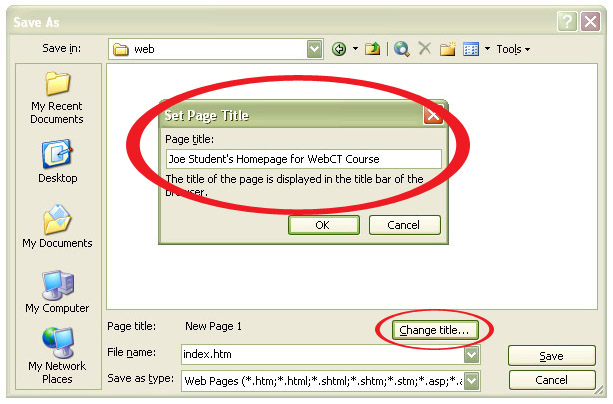
Make sure you provide a descriptive title for your page. The title
shows up at the very top of the browser and is the default text used
when someone bookmarks your page. You can have spaces in the title and
some special characters (like dashes and colons) but don't go wild with
the non-standard characters. Titles should be short but descriptive
(imagine them in a long list of other bookmarks and remember that they
are sorted alphabetically in those lists).
Step 3 Collecting Web Page Elements [back
to contents]
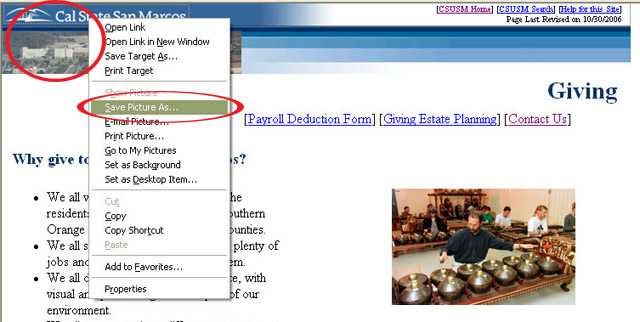
Collect the elements you want to use in your webpage. In this case,
the picture shows us grabbing the CSUSM generic department banner at the
top by right-clicking on it (PC users) and using the "Save Picture
As..." option (this varies by browser type, but you should have an
option to copy the image locally).
Save the image to the same folder where your "index.htm" file is and
make sure the filename does not contain spaces or unusual characters. In
this case, the image was renamed during the save process to be
"csusm_header.gif" (descriptive and without spaces).

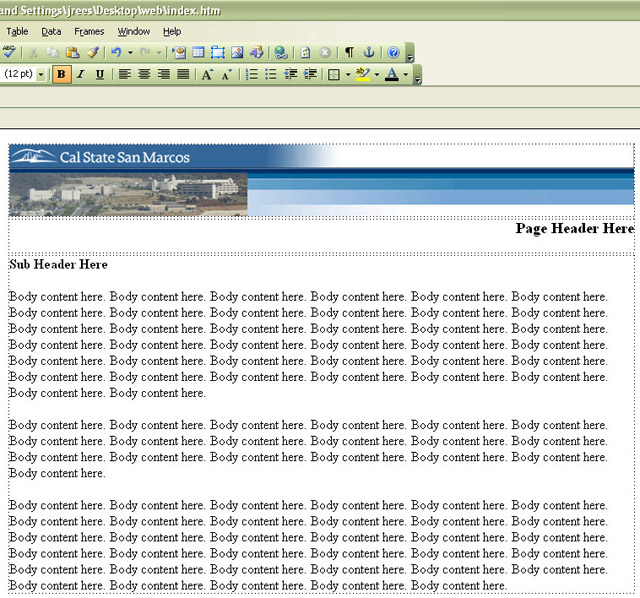
Create your webpage locally and use the elements saved within the
same folder, as seen below, to create the finalized page you want to
submit (note, the one below is for example only, you would have actual
content instead of the filler used). Save your file (index.htm) and you
are theoretically finished with your designing tool and ready for the
upload process within WebCT.
Step 5 Cleaning Up Your Workspace [back
to contents]
You now should have a folder ("web" in the example case) that
contains a completed web page and all of the elements used within the
web page. If you did NOT use some of the images you initially saved into
this folder, remove the extra images to some other location. We want the
"web" folder to only have files that need to be uploaded to WebCT.
Step 6 Preparing for Uploading/Attaching and
Zipping [back to contents]
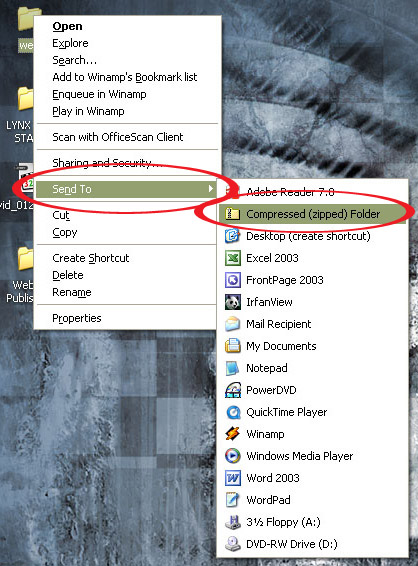
Now that you have a "web" folder ready for uploading, we need to
bundle it all together into a single file for uploading (attaching
through the assignment). You can do this in a number of ways, depending
on your operating system, but in the end you want a single ZIPPED file.
The newer Windows OS let you right click on the folder and use "Send To
>> Compressed (zipped) Folder." You could also use a Zip application
like WinZip or some other Macintosh equivalent. Once you are done, you
will have a compressed file to upload -- in this example, the file is
named "web.zip"
Step 7 Adding Attachment (Uploading Your Zipped
File) [back to contents]
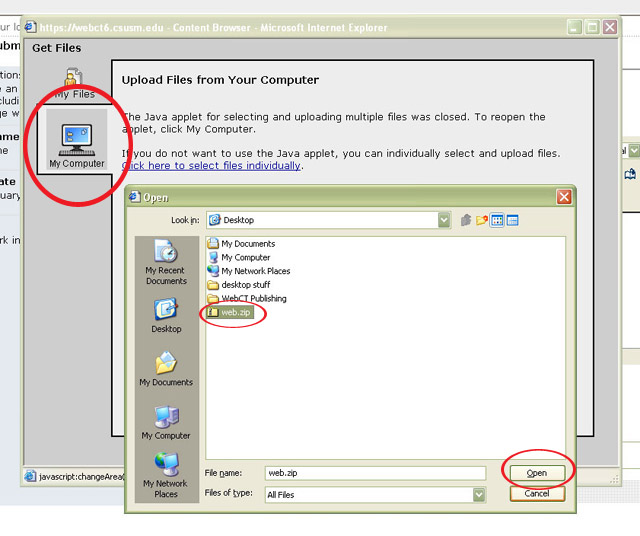
From the WebCT Assignment you are responding to, click on the "Add
Attachments" button under "Select ZIP file." This launches the "Get
Files" window where you will choose the "My Computer" tab on the left.
Find your newly zipped file ("web.zip" on the desktop for this example)
and then choose the "Open" option for the "Get Files" window. For some
users, the files need to be clicked more than once or you may even need
to use the "Click here to select files individually" option (non-java
option).
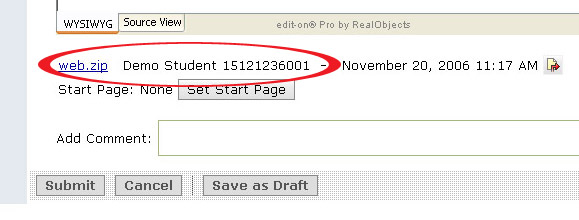
When successful, you should see your attached file back on the
assignment page as seen below. If you make a mistake, you can remove the
file attachment by clicking on the little yellow page (with a red arrow) to
the right of the file (below).
Step 8 Setting Your Start Page [back
to contents]
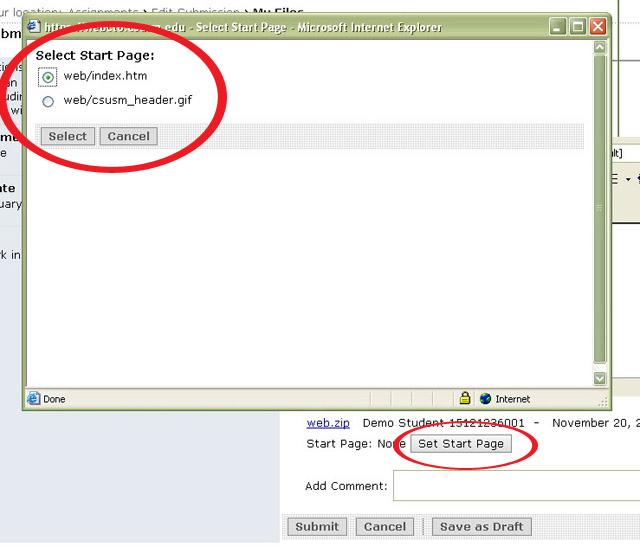
Set your "index.htm" page as the "Start Page" by clicking the button
"Set Start Page" on the assignment page. This will launch a window
showing all the files you uploaded. It is possible to have multiple web
pages in your folder, along with the "index.htm" page, but this is
asking for the main homepage ... thus your "index.htm" page should be
selected.
If successful, you should see the assignment page updated (as seen
below).
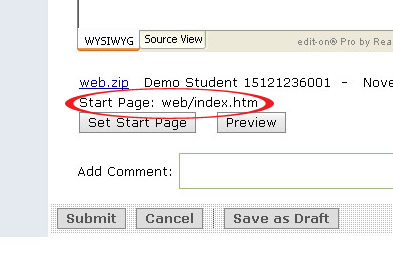
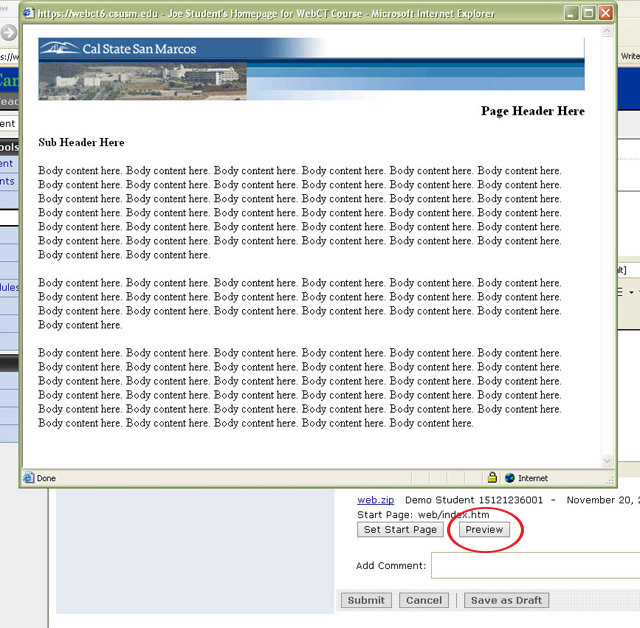
Notice you now have a "Preview" option. It is strongly recommended
that you use this option prior to submitting your work. Depending on how
the instructor setup the assignment, you may not have the option to take
back and correct a problem with the site once it is submitted. Clicking
on the preview, for this example, shows the homepage below.
Step 9 Submitting Your Assignment [back
to contents]
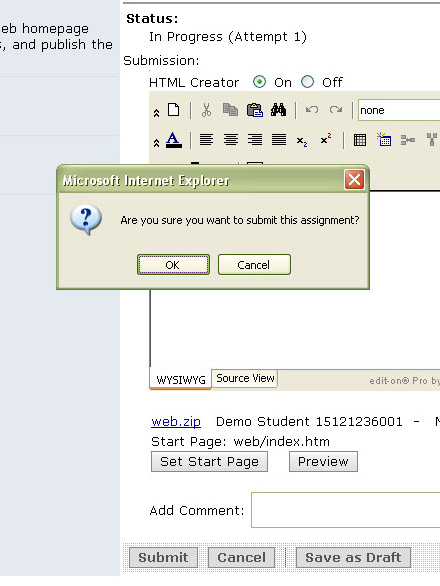
Assuming the "Preview" showed the correct page, you are now ready to
submit your changes and thus complete the assignment. Clicking on the
"Submit" button will prompt you to confirm (below).
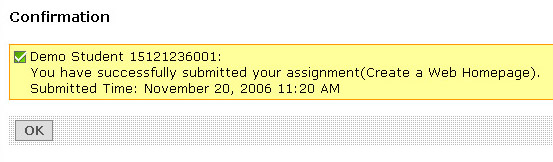
Your last page is a standard confirmation of your assignment
submission. You will now find your assignment moved from the "Inbox" to
the "Submitted" tab in "Assignments."
[back to contents]
|